스프링 부트와 리엑트를 이용한 채팅 구현
스프링 부트와 리엑트 간 채팅은 STOMP를 이용하여 구현할 예정이다.
React ----- Spring boot ----- Kafka/zookeeper
                 |
                 |
               Cache(Redis로 변경)
React는 websocket(STOMP)을 이용한 메세지 송수신을 담당Kafka는 Spring boot 내부 메세지 큐잉 역할Google common cache는 채팅 메시지를 저장하며 이는 Redis로 변경 예정Spring boot는React와 http 프로토콜 통신을 하는 메인 서버 역할
Spring Boot Server
이 부분에서는 Spring boot와 kafka를 이용한 Message chatting server 부분을 구현할 예정이다.
STOMP(Streaming Text Oriented Messaging Protocol)
STOMP는 스트리밍 텍스트 지향 메시징 프로토콜이다. STOMP 클라이언트는 STOMP 프로토콜을 지원하는 메시지 브로커와 통신한다. STOMP를 이용해 손쉬운 연결, 송수신, 구독, 연결 끊기 등과 같은 명령을 사용 가능하다.
시작하기에 앞서 기본적으로 Websocket과 Kafka에 대한 설정 파일을 만들어 주어야 한다.
1. WebSocket Config
package com.dydtjr1128.chatting.config;

import org.springframework.context.annotation.Configuration;
import org.springframework.messaging.simp.config.MessageBrokerRegistry;
import org.springframework.web.socket.config.annotation.EnableWebSocketMessageBroker;
import org.springframework.web.socket.config.annotation.StompEndpointRegistry;
import org.springframework.web.socket.config.annotation.WebSocketMessageBrokerConfigurer;

@Configuration
@EnableWebSocketMessageBroker
public class WebSocketConfig implements WebSocketMessageBrokerConfigurer {
    @Override
    public void configureMessageBroker(MessageBrokerRegistry registry) {
        registry.enableSimpleBroker("/topic");//sub용 sub topic/public
        registry.setApplicationDestinationPrefixes("/app");
        //메시지 보낼 url send /app/message
    }

    @Override
    public void registerStompEndpoints(StompEndpointRegistry registry) {
        registry.addEndpoint("/chatting").setAllowedOrigins("*").withSockJS();
        // URL//chatting  <-웹소켓 연결 주소
    }
}
웹소켓 연결에 필요한 셋팅을 해 주어야 한다.
2. Kafka config
package com.dydtjr1128.chatting.config;

import com.dydtjr1128.chatting.model.ChattingMessage;
import com.google.common.collect.ImmutableMap;
import org.apache.kafka.common.serialization.IntegerDeserializer;
import org.apache.kafka.common.serialization.IntegerSerializer;
import org.springframework.context.annotation.Bean;
import org.springframework.context.annotation.Configuration;
import org.springframework.kafka.annotation.EnableKafka;
import org.springframework.kafka.config.ConcurrentKafkaListenerContainerFactory;
import org.springframework.kafka.core.ConsumerFactory;
import org.springframework.kafka.core.DefaultKafkaConsumerFactory;
import org.springframework.kafka.core.DefaultKafkaProducerFactory;
import org.springframework.kafka.core.KafkaTemplate;
import org.springframework.kafka.core.ProducerFactory;
import org.springframework.kafka.support.serializer.JsonDeserializer;
import org.springframework.kafka.support.serializer.JsonSerializer;

import java.util.Map;

@EnableKafka
@Configuration
public class KafkaConfig {
    //Sender config
    @Bean
    public ProducerFactory<String, ChattingMessage> producerFactory() {
        return new DefaultKafkaProducerFactory<>(producerConfigs(), null, new JsonSerializer<ChattingMessage>());
    }

    @Bean
    public KafkaTemplate<String, ChattingMessage> kafkaTemplate() {
        return new KafkaTemplate<>(producerFactory());
    }

    @Bean
    public Map<String, Object> producerConfigs() {

        return ImmutableMap.<String, Object>builder()
                .put("bootstrap.servers", "localhost:9092")//kafka server ip & port
                .put("key.serializer", IntegerSerializer.class)
                .put("value.serializer", JsonSerializer.class)//Object json parser
                .put("group.id", "spring-boot-test") // chatting  group id
                .build();
    }
    //Receiver config
    @Bean
    public ConcurrentKafkaListenerContainerFactory<String, ChattingMessage> kafkaListenerContainerFactory() {
        ConcurrentKafkaListenerContainerFactory<String, ChattingMessage> factory = new ConcurrentKafkaListenerContainerFactory<>();
        factory.setConsumerFactory(consumerFactory());
        return factory;
    }

    @Bean
    public ConsumerFactory<String, ChattingMessage> consumerFactory() {
        return new DefaultKafkaConsumerFactory<>(consumerConfigs(), null, new JsonDeserializer<>(ChattingMessage.class));
    }

    @Bean
    public Map<String, Object> consumerConfigs() {
        return ImmutableMap.<String, Object>builder()
                .put("bootstrap.servers", "localhost:9092")
                .put("key.deserializer", IntegerDeserializer.class)
                .put("value.deserializer", JsonDeserializer.class)
                .put("group.id", "spring-boot-test")
                .build();
    }
}
Receiver와 Sender에 대한 설정을 해준다.
3. Create controller class for WebSocket Comunication
package com.dydtjr1128.chatting.controller;

import com.dydtjr1128.chatting.model.ChattingMessage;
import com.dydtjr1128.chatting.service.Receiver;
import com.dydtjr1128.chatting.service.Sender;
import com.fasterxml.jackson.databind.ObjectMapper;
import org.springframework.beans.factory.annotation.Autowired;
import org.springframework.messaging.handler.annotation.MessageMapping;
import org.springframework.messaging.handler.annotation.SendTo;
import org.springframework.web.bind.annotation.CrossOrigin;
import org.springframework.web.bind.annotation.RequestMapping;
import org.springframework.web.bind.annotation.RestController;

import java.util.HashMap;
import java.util.List;

@RestController
@CrossOrigin
public class ChattingController {

    @Autowired
    private Sender sender;

    @Autowired
    private Receiver receiver;

    @Autowired
    private ChattingHistoryDAO chattingHistoryDAO;

    private static String BOOT_TOPIC = "kafka-chatting";

    //// "url/app/message"로 들어오는 메시지를 "/topic/public"을 구독하고있는 사람들에게 송신
    @MessageMapping("/message")//@MessageMapping works for WebSocket protocol communication. This defines the URL mapping.
    //@SendTo("/topic/public")//websocket subscribe topic& direct send
    public void sendMessage(ChattingMessage message) throws Exception {
        message.setTimeStamp(System.currentTimeMillis());
        chattingHistoryDAO.save(message);
        sender.send(BOOT_TOPIC, message);

    }

    @RequestMapping("/history")
    public List<ChattingMessage> getChattingHistory() throws Exception {
        System.out.println("history!");
        return chattingHistoryDAO.get();
    }

    @MessageMapping("/file")
    @SendTo("/topic/chatting")
    public ChattingMessage sendFile(ChattingMessage message) throws Exception {
        return new ChattingMessage(message.getFileName(), message.getRawData(), message.getUser());
    }

}
4. Messages caching
package com.dydtjr1128.chatting.controller;

import com.dydtjr1128.chatting.model.ChattingMessage;
import com.google.common.cache.Cache;
import com.google.common.cache.CacheBuilder;
import org.springframework.stereotype.Component;

import java.util.Comparator;
import java.util.List;
import java.util.UUID;
import java.util.concurrent.TimeUnit;
import java.util.stream.Collectors;

@Component
public class ChattingHistoryDAO {

    // A simple cache for temporarily storing chat data
    private final Cache<UUID, ChattingMessage> chatHistoryCache = CacheBuilder
            .newBuilder().maximumSize(20).expireAfterWrite(10, TimeUnit.MINUTES)
            .build();

    public void save(ChattingMessage chatObj) {
        this.chatHistoryCache.put(UUID.randomUUID(), chatObj);
    }

    public List<ChattingMessage> get() {
        return chatHistoryCache.asMap().values().stream()
                .sorted(Comparator.comparing(ChattingMessage::getTimeStamp))
                .collect(Collectors.toList());
    }

}
메시지를 최대 20개, 10분동안만 저장하도록 캐쉬를 이용한다. 이 부분은 Redis 를 이용한 처리부분으로 변경 할 수 있다.
5. Message model
package com.dydtjr1128.chatting.model;

import lombok.Getter;
import lombok.Setter;
import lombok.ToString;

import java.io.Serializable;

@Getter
@Setter
@ToString
public class ChattingMessage implements Serializable {
    private String message;
    private String user;
    private Long timeStamp;

    private String fileName;
    private String rawData;

    public ChattingMessage() {
    }

    public ChattingMessage(String message, String user) {
        this.user = user;
        this.message = message;
    }

    public ChattingMessage(String fileName, String rawData, String user) {

        this.fileName = fileName;
        this.rawData = rawData;
        this.user = user;
    }

    public ChattingMessage(String message) {
        this.message = message;
    }
}
메시지를 담을 수 있는 ChattingMessage 모델을 만들어준다.
6. Kafka Listener
package com.dydtjr1128.chatting.service;

import com.dydtjr1128.chatting.model.ChattingMessage;
import com.fasterxml.jackson.databind.ObjectMapper;
import org.slf4j.Logger;
import org.slf4j.LoggerFactory;
import org.springframework.beans.factory.annotation.Autowired;
import org.springframework.kafka.annotation.KafkaListener;
import org.springframework.messaging.simp.SimpMessagingTemplate;
import org.springframework.stereotype.Service;

import java.util.HashMap;

@Service
public class Receiver {
    private static final Logger LOGGER = LoggerFactory.getLogger(Receiver.class);

    @Autowired
    private SimpMessagingTemplate template;

    @KafkaListener(id = "main-listener", topics = "kafka-chatting")
    public void receive(ChattingMessage message) throws Exception {
        LOGGER.info("message='{}'", message);
        HashMap<String, String> msg = new HashMap<>();
        msg.put("timestamp", Long.toString(message.getTimeStamp()));
        msg.put("message", message.getMessage());
        msg.put("author", message.getUser());

        ObjectMapper mapper = new ObjectMapper();
        String json = mapper.writeValueAsString(msg);

        this.template.convertAndSend("/topic/public", json);
    }
}
Kafka server로부터 수신 할 수 있는 Receiver을 만들어준다. 메시지를 수신하여 연결된 React client로 STOMP 프로토콜을 이용해 메시지를 송신한다.
7. Message Sender
package com.dydtjr1128.chatting.service;

import com.dydtjr1128.chatting.model.ChattingMessage;
import org.slf4j.Logger;
import org.slf4j.LoggerFactory;
import org.springframework.beans.factory.annotation.Autowired;
import org.springframework.kafka.core.KafkaTemplate;
import org.springframework.stereotype.Component;

@Component
public class Sender {
    private static final Logger LOGGER = LoggerFactory.getLogger(Sender.class);

    @Autowired
    private KafkaTemplate<String, ChattingMessage> kafkaTemplate;

    public void send(String topic, ChattingMessage data) {
        LOGGER.info("sending data='{}' to topic='{}'", data, topic);
        kafkaTemplate.send(topic, data);// send to react clients via websocket(STOMP)
    }
}
Kafka server로 메시지를 송신 할 수 있는 Sender을 만들어준다.
React
필요 라이브러리는 다음과 같다.
{
  "name": "chatting-client-react",
  "version": "0.1.0",
  "private": true,
  "dependencies": {
    "json-fetch": "^8.0.0",
    "randomstring": "^1.1.5",
    "react": "^16.8.6",
    "react-dom": "^16.8.6",
    "react-scripts": "3.0.1",
    "react-stomp": "^4.1.0",
    "react-talk": "^1.0.0",
    "username-generator": "^1.1.0"
  },
  "scripts": {
    "start": "react-scripts start",
    "build": "react-scripts build",
    "test": "react-scripts test",
    "eject": "react-scripts eject"
  },
  "proxy": "http://localhost:8080",
  "eslintConfig": {
    "extends": "react-app"
  },
  "browserslist": {
    "production": [
      ">0.2%",
      "not dead",
      "not op_mini all"
    ],
    "development": [
      "last 1 chrome version",
      "last 1 firefox version",
      "last 1 safari version"
    ]
  }
}
import React from 'react';
import './App.css';
import SockJsClient from "react-stomp";
import UsernameGenerator from "username-generator";
import Fetch from "json-fetch";
import { TalkBox } from "react-talk";
import randomstring from"randomstring";

class App extends React.Component {

  constructor(props) {
    super(props);
    // randomUserId is used to emulate a unique user id for this demo usage
    this.randomUserName = UsernameGenerator.generateUsername("-");
    this.randomUserId = randomstring.generate();
    this.sendURL = "/message";
    this.state = {
      clientConnected : false,
      messages : []
    };

  }

  onMessageReceive = (msg, topic) => {
    //alert(JSON.stringify(msg) + " @ " +  JSON.stringify(this.state.messages)+" @ " + JSON.stringify(topic));
    this.setState(prevState => ({
      messages: [...prevState.messages, msg]
    }));
  }

  sendMessage = (msg, selfMsg) => {
    try {
      var send_message = {
        "user" : selfMsg.author,
        "message" : selfMsg.message
      }
      this.clientRef.sendMessage("/app/message", JSON.stringify(send_message));
      return true;
    } catch(e) {
      return false;
    }
  }

  componentWillMount() {
    console.log("call history");
    Fetch("/history", {
      method: "GET"
    }).then((response) => {
      this.setState({ messages: response.body });
    });
  }

  render() {
    const wsSourceUrl = "http://localhost:8080/chatting";
    return (
      <div>
        <TalkBox topic="/topic/public" currentUserId={ this.randomUserId }
          currentUser={ this.randomUserName } messages={ this.state.messages }
          onSendMessage={ this.sendMessage } connected={ this.state.clientConnected }/>

        <SockJsClient url={ wsSourceUrl } topics={["/topic/public"]}
          onMessage={ this.onMessageReceive } ref={ (client) => { this.clientRef = client }}
          onConnect={ () => {this.setState({ clientConnected: true }) } }
          onDisconnect={ () => { this.setState({ clientConnected: false }) } }
          debug={ false } style={[{width:'100%', height:'100%'}]}/>
      </div>
    );
  }
}

export default App;
React client는 react-stomp과 react-talk 모듈을 이용하여 구현하였다.
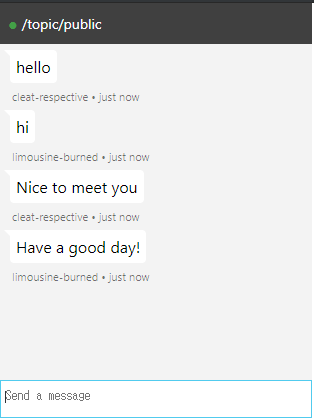
Result